 |
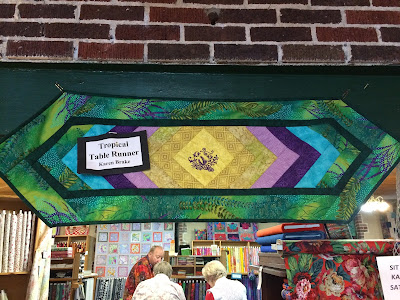
| Tropical Braided Table Runner by Karen Brake. This beauty was hanging at the quilt shop. |
We used a pattern, #GE-101, from GE Designs of Chanhassen, Minnesota. The runner is a "Quilt as you go" pattern. The finished table runner is 17 inches wide and 52 inches long (42cm x 130cm).
 |
| Two examples of the table runner to inspire us. |
Before starting we basted the backing and binding together. We used very thin binding, very low loft, since a pouffy effect was not desired.
We then marked the center of the fabric to place the center square on point. This is a very important step.
The strips are added on to the ends, making a point at each end....sort of the opposite of a log cabin....points on the ends and open triangles on the sides. The strips are 2 1/2 inches wide with 4 strips of each color, two 6 inch and two 8 inch. The strips are sewn in place, on each end, with a 1/4 inch seam, then pressed.
 |
| Adding the border. |
 |

Carefully adding the border.
The ends of the border are next to keep the braided effect. The wide border goes on next in the same fashion, then the binding to complete the runner.
When we finished the class we weren't done with the runners but they were close enough for pictures. We had the basics down.
 |
| Table runner in blue and purples. |
 |
| Table runner in Gator colors...go Gators! |
 |
| Karen, our class leader, with hers. |
 |
| And here's me with mine. |
 |
| Ta Da! The finished product. I used brown and sage green calicos for a vintage look. It will look good on my old, I mean antique, dining table. |
It wasn't too difficult but it did take concentration. I didn't pull my hair or chew my nails so I think I might do it again, maybe in blues for Hanukkah. Got to think on it.
Happy Stitching!
Post by Eileen of GoofingOff Sewing....getting the UFO basket emptied out, one project at a time.
No comments:
Post a Comment